


The day has come.
Adobe (new owner of Magento) ended support for the 12-year-old Magento 1.x release line for both Magento Commerce and Magento Open Source on June 30, 2020.
What does this mean to a small business owner?
If you didn't migrate Magento 1 to 2, you’re on your own with anything your website may require.
Official support has ended, so don't expect any more official patches or security updates.
The time for Magento 2 migration has come.
I’m going to help you make the transition.
This guide will walk you through migrating a stock Magento 1 installation (with sample data) to a fully functional Magento 2 store.
I’ll outline possible issues that may arise during or after migration and suggest fixes.
How will this be helpful?
Except for highly customized shops, a typical Magento 1 store is not much different from a stock installation.
By following this tutorial, you’ll be able to migrate M1 to M2 yourself, saving your business thousands of dollars in developer fees.
However, if you would like an experienced developer to make sure your migration goes smoothly the first time, then you may find out more about our professional service here.
P.S.: Make sure to backup your database and files before you attempt to move to M2. There may be issues, and it is important to have a Plan B just in case.
Also, consider test-driving the migration process on a staging environment first. Make a copy of your website somewhere (on a different server preferably) and practice your update steps there.
Listen to three Magento gurus talking about M1 to M2 transition.
The 5-Step Magento 1 to Magento 2 Migration Process
Stock M2 installation
Data migration
Theme migration
Migrating extensions
Test, test, test
Step 0: Software and Hardware Requirements
Magento 2 will run poorly on outdated software, and it won’t work on PHP 5.
Your server should have the following programs installed:
PHP: 7.0.13+ or 7.1.x
MySQL: 5.6, 5.7 or MariaDB 10.0,10.1,10.2 or Percona 5.7
The following PHP extensions: bc-math, ctype, curl, dom, gd, intl, mbstring, mcrypt, hash, openssl, PDO/MySQL, SimpleXML, soap, spl, libxml, xsl, zip, json, iconv
There are also certain hardware recommendations:
At least 2G of RAM minimum
24GB+ SSD (Solid State Drive)
M2 won’t run well with less than 2G of RAM, and SSD technology will cause it to run much faster.
For more on the topic, read my previous post.
Step 1: Stock Magento 2 Installation
Transition to Magento 2 starts by installing a fresh copy of the latest Magento 2 software.
Let’s head over to the official website and grab the latest version of M2 Open Source.
As of time of this writing, that’s 2.3.0.
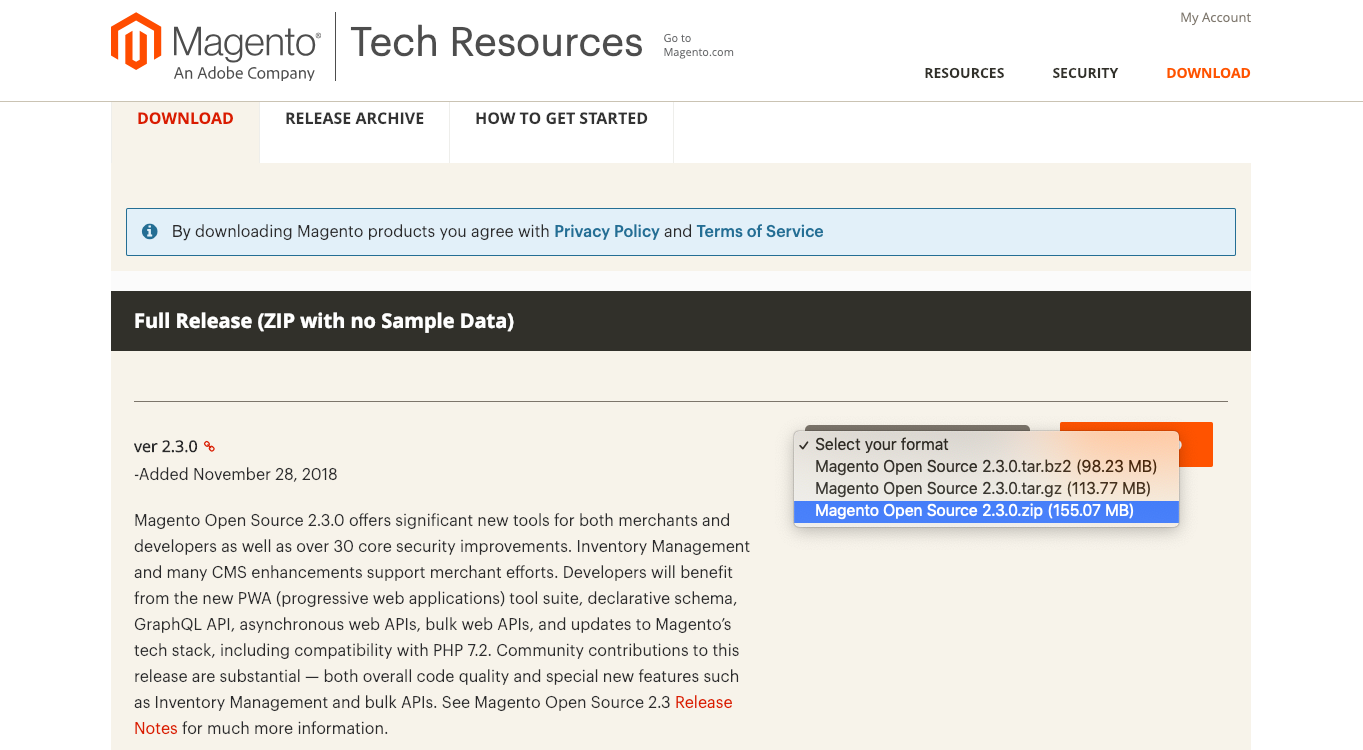 Download the latest Magento 2 software
Once downloaded, install it on a basic VPS (virtual private server) with 2G of RAM and 24G of SSD space.
I am using Nginx and PHP-FPM 7.1.
It’s easier than ever to pair Nginx with Magento 2 since the latter comes with a premade configuration file, nginx.conf.sample.
When everything is ready, let’s open up a browser and start the installation process.
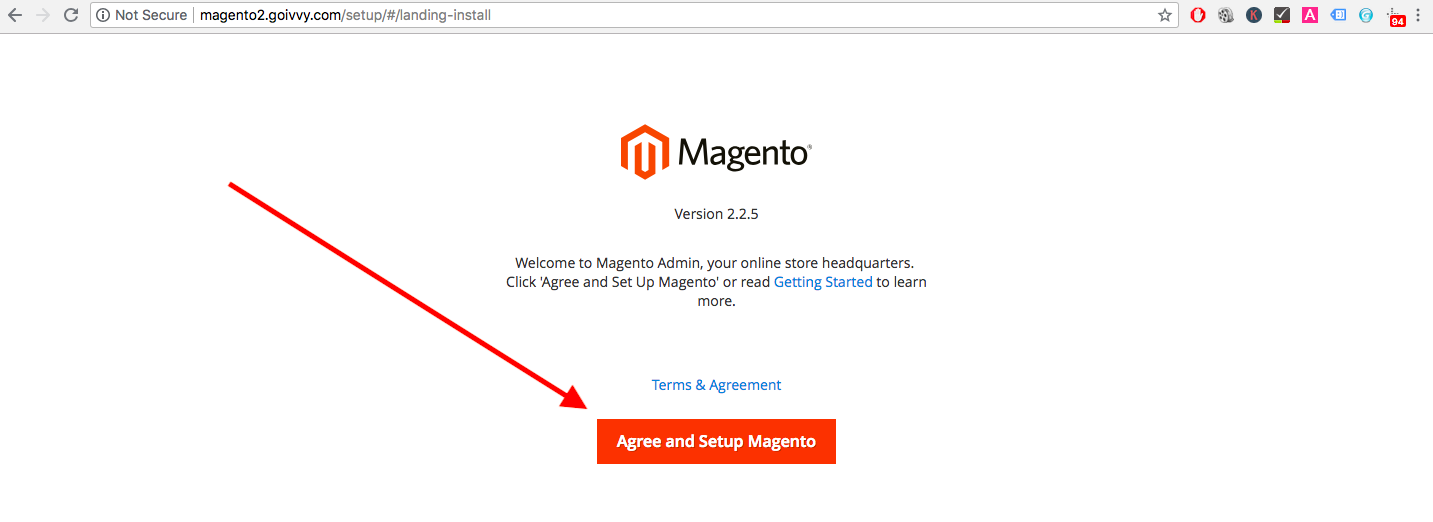 Installing Magento 2: Step 1
The readiness check failed since I had quite a few PHP extensions missing.
 Missing Extensions While Installing Magento 2
I went ahead and installed the missing software with the following command (I was using Debian 9):
apt-get install php7.1-curl php7.1-mcrypt php7.1-bcmath |
Finally, step 6:
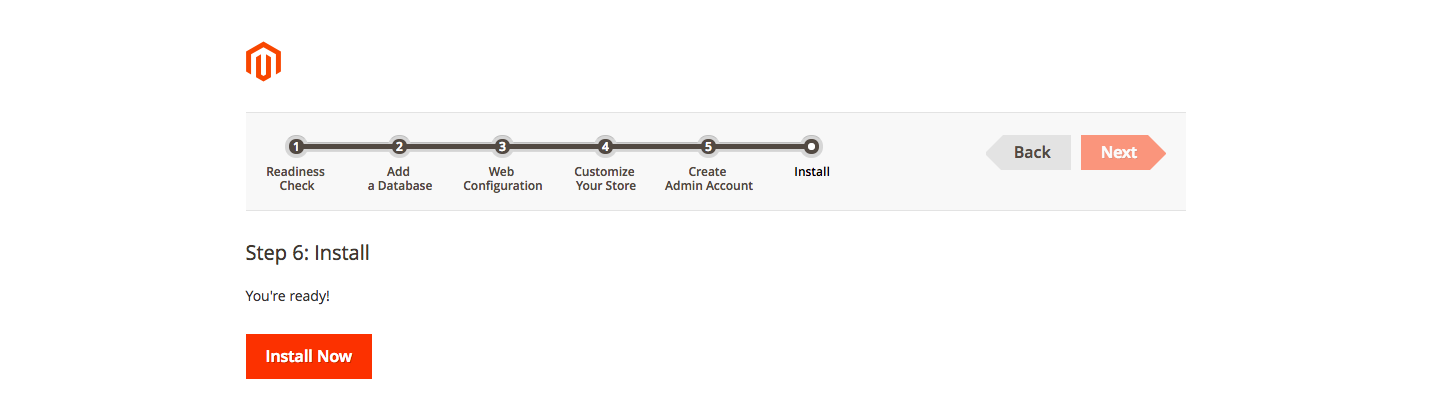 Installing Magento 2: Step6
Press the “Install Now” button to begin.
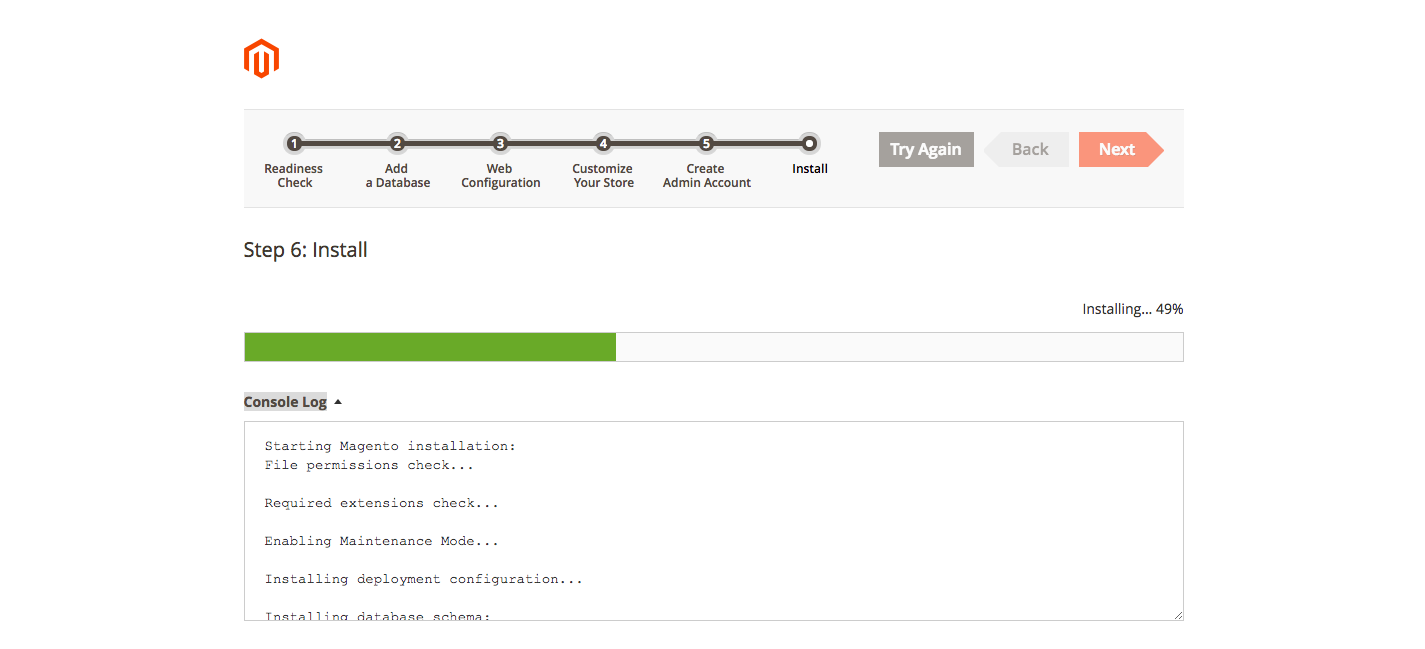 Install Log
Before long, the “Success” message will appear. For this example, it took me about half a minute.
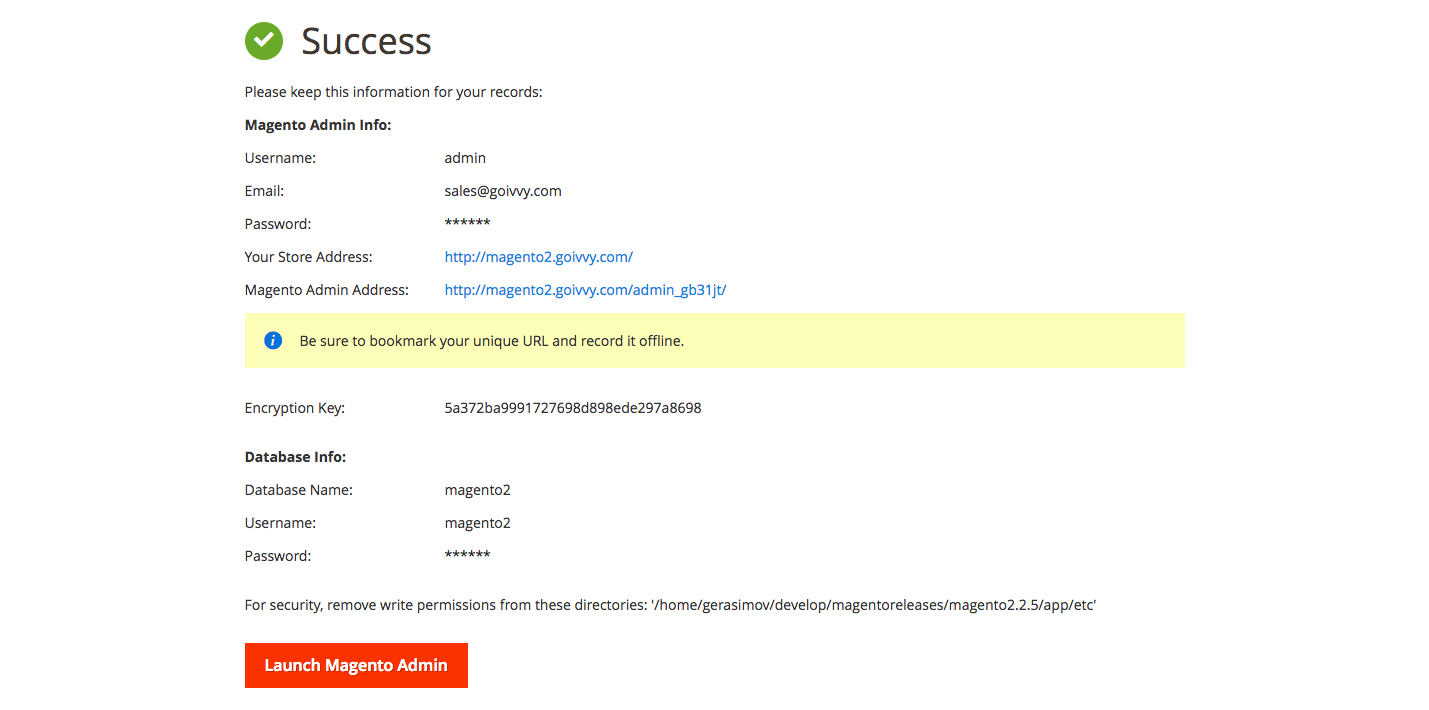 Success!
Now that we have a fresh Magento 2 store, it’s time to migrate the data from the old M1 site.
In our case, the old Magento 1 site is not actually that old.
It’s just a fresh Magento 1.9.3.9 install loaded with sample data.
 Magento 1 with Sample Data
You can download it from the official website.
Magento 2 Data Migration
The Magento team has simplified the Magento 2 migration process with an automatic Magento Migration Tool (MMT).
This program will transfer the data from your old M1 installation to the new M2 store.
Notice: You will need SSH (Secure Shell) access to perform a migration. Obtain it from your system administrator or your hosting support team.
Install the MMT from repo.magento.com using a PHP package manager software called composer.
If you haven’t installed composer, go ahead and do so now. Visit the Getting Started page on the official website for more information.
The Magento Migration Tool installation will place the files into a Magento 2 folder, which I’d setup in the previous step.
The following commands should do the trick, so run them inside the folder:
composer config repositories.magento composer https://repo.magento.com |
composer require magento/data-migration-tool:2.3.0 |
Take note of the 2.3.0 at the end of the second command. That is our M2 platform version.
If you’re migrating to a different version, change the command accordingly.
Upon running the composer require, the system will ask you for your authentication keys.
Get these by heading over to My Profile on Magento Marketplace website.
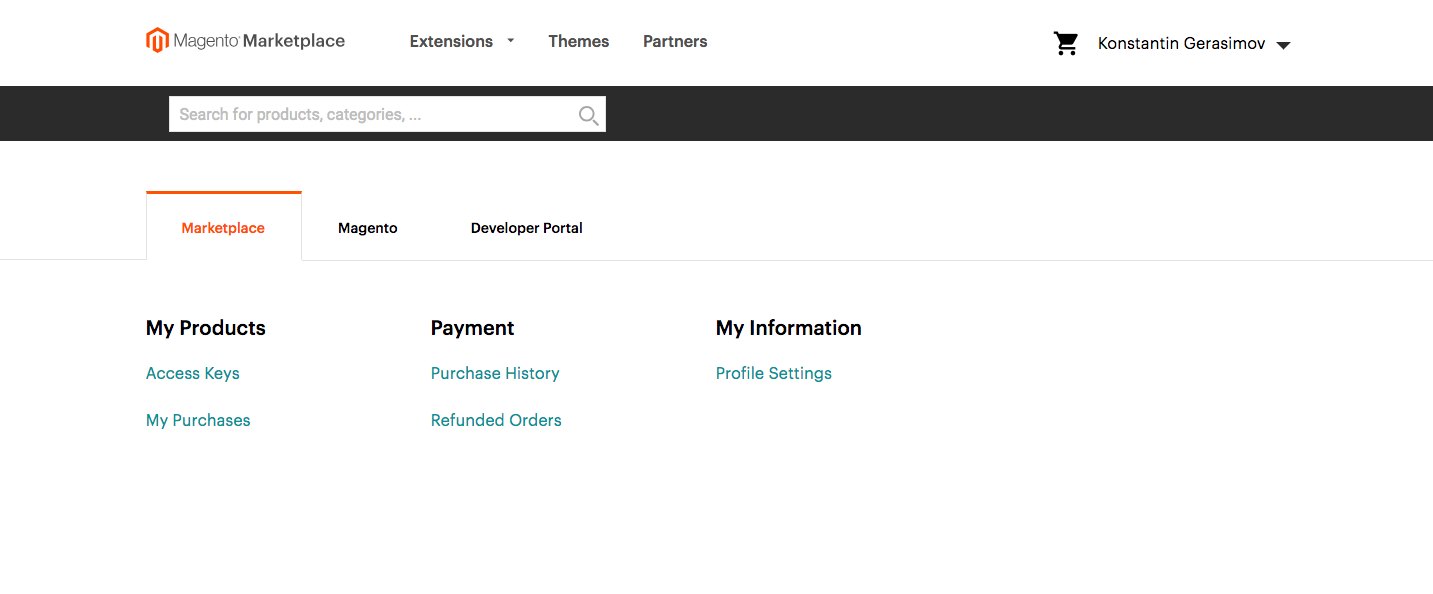 My Profile Magento Marketplace
Click on Access Keys under My Products menu.
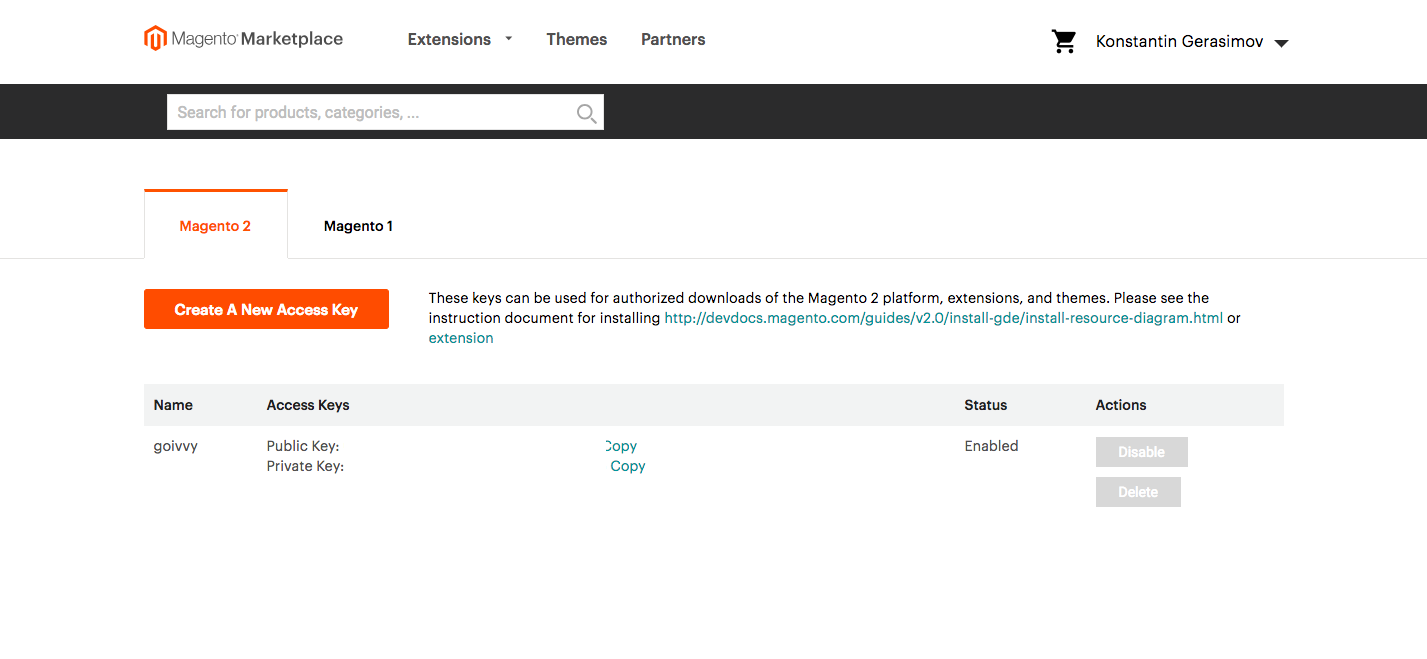 Access Keys Magento Marketplace
Create a new Access key if necessary.
Then use the Public Key as a username and the Private Key as a password.
Once you enter that information, you should be able to install the data migration tool successfully.
root# composer require magento/data-migration-tool:2.3.0./composer.json has been updatedLoading composer repositories with package informationUpdating dependencies (including require-dev)Package operations: 1 install, 0 updates, 0 removals - Installing magento/data-migration-tool (2.3.0): Downloading (100%) Writing lock fileGenerating autoload files |
Next, we’ll need to configure the tool.
Go to the Magento 2 root folder and find the following directory:
vendor/magento/data-migration-tool/etc/opensource-to-opensource/1.9.3.9 |
Copy config.xml.dist file to config.xml.
Substitute 1.9.3.9 with your site’s Magento 1 version and change opensource-to-opensource to opensource-to-commerce if you are migrating from the Community Edition to Enterprise (now known as Commerce).
Now open config.xml and find the code block below:
<source> <database host="localhost" name="magento1" user="root" /></source><destination> <database host="localhost" name="magento2" user="root" /></destination> |
Then enter Magento 1 and Magento 2 database credentials.
Include password attribute like this:
<source> <database host="localhost" name="magento1" user="magento1" password="magento1"/></source><destination> <database host="localhost" name="magento2" user="magento2" password="magento2"/></destination> |
Inside the <options> tag is another mandatory field to specify - <crypt_key>:
<options>……<crypt_key>689e13e5b98a2d82da67a7042b582f9e</crypt_key>…</options> |
You can find your M1 crypt_key within the app/etc/local.xml file inside your old site’s root folder.
<config> <global> <install> <date><![CDATA[Wed, 12 Sep 2018 21:29:35 +0000]]></date> </install> <crypt> <key><[CDATA[<strong>689e13e5b98a2d82da67a7042b582f9e</strong>]]></key> </crypt> <disable_local_modules>false</disable_local_modules> <resources> |
Settings Migration
Now, we start the actual data migration.
We first migrate settings, so head over to the M2 root folder and run:
php bin/magento migrate:settings vendor/magento/data-migration-tool/etc/opensource-to-opensource/1.9.3.9/config.xml |
Make sure to specify the correct path to your config.xml.
In our case, there were no errors, so the settings migration went fine:
# php bin/magento migrate:settings vendor/magento/data-migration-tool/etc/opensource-to-opensource/1.9.3.9/config.xml[2018-09-14 18:22:22][INFO][mode: settings][stage: integrity check][step: Settings Step]: started100% [============================] Remaining Time: < 1 sec[2018-09-14 18:22:22][INFO][mode: settings][stage: integrity check][step: Stores Step]: started100% [============================] Remaining Time: < 1 sec[2018-09-14 18:22:22][INFO][mode: settings][stage: data migration][step: Settings Step]: started100% [============================] Remaining Time: < 1 sec[2018-09-14 18:22:24][INFO][mode: settings][stage: data migration][step: Stores Step]: started100% [============================] Remaining Time: < 1 sec[2018-09-14 18:22:24][INFO][mode: settings][stage: volume check][step: Stores Step]: started100% [============================] Remaining Time: < 1 sec[2018-09-14 18:22:24][INFO][mode: settings][stage: volume check][step: Stores Step]: Migration completed |
Of course, this is a simple case and your store may be more complex than a stock installation.
If so, consider changing the following default setting in the XML configuration file:
vendor/magento/data-migration-tool/etc/opensource-to-opensource/1.9.3.9/config.xml:
<settings_map_file>etc/opensource-to-opensource/settings.xml.dist></settings_map_file> |
Copy this to settings.xml before editing.
And don’t forget to set the right filename in config.xml!
<settings_map_file>etc/opensource-to-opensource/settings.xml</settings_map_file> |
Now open up settings.xml and study its contents, but it’s pretty self-explanatory.
If you need to ignore a setting, you do:
<ignore> <path>path/to/setting</path></ignore> |
To rename:
<rename> <path>crontab/jobs/system_backup/schedule/cron_expr</path> <to>crontab/default/jobs/system_backup/schedule/cron_expr</to></rename> |
You should be able to set up settings.xml any way you need.
Initial Data Migration
Now, we’re ready to transfer orders, customers and the actual store data. Do this by inputting the following command:
# php bin/magento migrate:data vendor/magento/data-migration-tool/etc/opensource-to-opensource/1.9.3.9/config.xml |
When I ran it, I got the “Integrity Check failed” message along with a bunch of errors:
# php bin/magento migrate:data vendor/magento/data-migration-tool/etc/opensource-to-opensource/1.9.3.9/config.xml[2018-09-17 20:40:46][INFO][mode: data][stage: integrity check][step: Data Integrity Step]: started100% [============================] Remaining Time: < 1 sec[2018-09-17 20:40:47][ERROR]: Foreign key (FK_CATALOG_EAV_ATTRIBUTE_ATTRIBUTE_ID_EAV_ATTRIBUTE_ATTRIBUTE_ID) constraint fails on source database. Orphan records id: 121,164 from `catalog_eav_attribute`.`attribute_id` has no referenced records in `eav_attribute`[2018-09-17 20:40:47][ERROR]: Foreign key (FK_CAT_PRD_ENTT_INT_ATTR_ID_EAV_ATTR_ATTR_ID) constraint fails on source database. Orphan records id: 121 from `catalog_product_entity_int`.`attribute_id` has no referenced records in `eav_attribute`[2018-09-17 20:40:47][ERROR]: Foreign key (FK_EAV_ENTITY_ATTRIBUTE_ATTRIBUTE_ID_EAV_ATTRIBUTE_ATTRIBUTE_ID) constraint fails on source database. Orphan records id: 121,163,164 from `eav_entity_attribute`.`attribute_id` has no referenced records in `eav_attribute`…..…..….. |
Let’s fix them one by one.
The first error, “Foreign key constraint fails,” is actually a pretty simple issue:
[2018-09-18 18:31:18][ERROR]: Foreign key (FK_CATALOG_EAV_ATTRIBUTE_ATTRIBUTE_ID_EAV_ATTRIBUTE_ATTRIBUTE_ID) constraint fails on source database. Orphan records id: 121,164 from `catalog_eav_attribute`.`attribute_id` has no referenced records in `eav_attribute` |
We just have to delete any orphaned records from the specified tables:
DELETE FROM catalog_eav_attribute WHERE attribute_id IN (121, 164); |
The second error was “Field is not mapped”:
[2018-09-18 18:56:57][INFO][mode: data][stage: integrity check][step: EAV Step]: started100% [============================] Remaining Time: < 1 sec[ERROR]: Source fields are not mapped. Document: customer_eav_attribute. Fields: is_used_for_customer_segment |
Here's the manual way to do this, but if you'd like to save some time, there's also an automated method (scroll down a bit).
1. Manual Way
To fix this one, just exclude the fields in question from the map-eav.xml file:
<options> <map_file>etc/opensource-to-opensource/1.9.3.9/map.xml.dist</map_file> <eav_map_file><strong>etc/opensource-to-opensource/map-eav.xml.dist</eav_map_file> |
Since it’s under the EAV step, the correct file is map-eav.xml.dist.
You can choose to rename map-eav.xml.dist to map-eav.xml, or leave it as it is, but if you do rename it, don’t forget to change the config.xml file as well.
Let’s open up the map-eav XML file and add the following lines inside the <field_rules> </field_rules> tags:
<field_rules>…. <ignore> <field>customer_eav_attribute.is_used_for_customer_segment</field> </ignore>…..</field_rules> |
These lines tell the migration tool to ignore the unmapped field.
After modifying any XML file, make sure to add an “-r” (reset) switch to the migrate:data command so the changes are picked up:
php bin/magento migrate:data -r vendor/magento/data-migration-tool/etc/opensource-to-opensource/1.9.3.9/config.xml |
The next issue involves a message saying that the “Source documents are not mapped.”
You can take care of this issue manually, as I’ve done below, but there’s also an automated method that I’ll describe next.
[2018-09-18 19:21:52][INFO][mode: data][stage: integrity check][step: Map Step]: started100% [============================] Remaining Time: < 1 sec[2018-09-18 19:21:55][ERROR]: Source documents are not mapped: paybox_question_number,social_facebook_actions,strikeiron_tax_rate |
By “documents” the tool means the DB tables.
We have to work with the XML map file since it falls under the Map step:
<options> <map_file>etc/opensource-to-opensource/1.9.3.9/map.xml.dist</map_file> |
Place ignore statements in that file like so:
<document_rules>…... <ignore> <document>paybox_question_number</document> </ignore> <ignore> <document>social_facebook_actions</document> </ignore> <ignore> <document>strikeiron_tax_rate</document> </ignore>….</document_rules> |
You get the idea; we’re just adding ignore statements to the XML map file.
If it’s a document, we ignore the corresponding table, and if it’s a field, we ignore a table field.
Since this will require a bit of copying and pasting, it may take some time to complete.
For me, it took around half an hour to finally pass the integrity check.
2. Automated Way
This magic option will save you tons of time.
[NOTICE]: You can use --auto or -a option to ignore not mapped differences between source and destination to continue migration
Finally, I was able to successfully migrate all the data:
php bin/magento migrate:data -r -a vendor/magento/data-migration-tool/etc/opensource-to-opensource/1.9.3.9/config.xml[2018-09-19 17:48:50][INFO][mode: data][stage: integrity check][step: Data Integrity Step]: started…..…..…..[2018-09-19 17:49:11][INFO][mode: data][stage: volume check][step: Tier Price Step]: started100% [============================] Remaining Time: < 1 sec[2018-09-19 17:49:11][INFO][mode: data][stage: data migration][step: SalesIncrement Step]: started100% [============================] Remaining Time: < 1 sec[2018-09-19 17:49:11][INFO][mode: data][stage: volume check][step: SalesIncrement Step]: started100% [============================] Remaining Time: < 1 sec[2018-09-19 17:49:11][INFO][mode: data][stage: data migration][step: PostProcessing Step]: started100% [============================] Remaining Time: < 1 sec[2018-09-19 17:49:11][INFO][mode: data][stage: data migration][step: PostProcessing Step]: <strong>Migration completed</strong> |
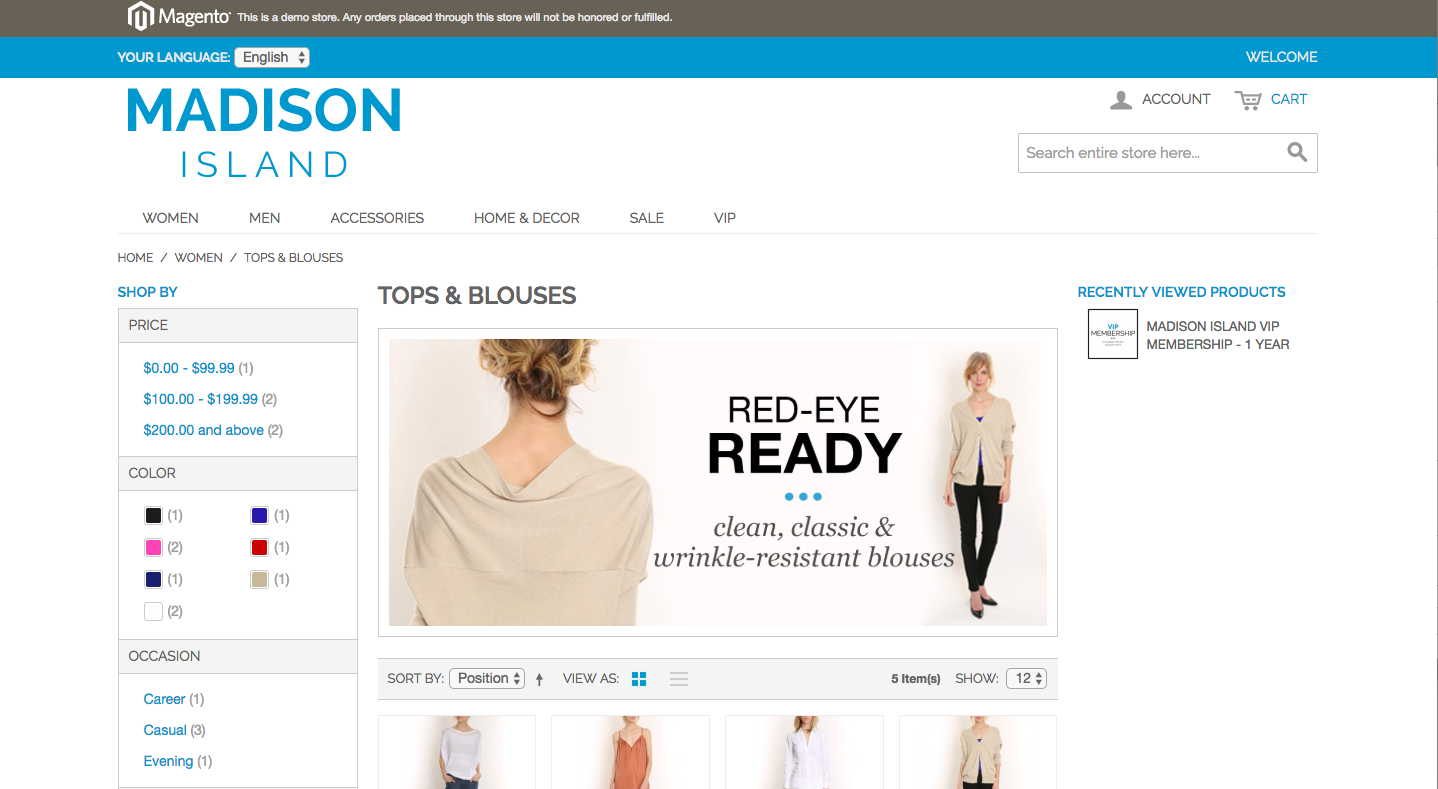
Now, if we open the newly migrated Magento 2 site, we’ll see something like this:
 Data After M1 to M2 Migration
Our Magento 1 categories and images are missing, so we’re not quite done yet.
Migration of Media Files
Expect to manually transfer a few aspects of your site, such as images.
Important: If you store your media in a database (as Magento 1 can do), it will automatically get transferred to M2.
Just Sync it before data migration:
Magento 1 backend menu > System > Configuration > Advanced > System
Click on a Synchronize button
 Synchronize Media
In this example, I’ve stored the media in a file.
To copy the data over to Magento 2, we simply copy the M1:media folder over to M2:pub/media:
cp -r /path/to/magento1/media /path/to/magento2/pub |
After that, we have to reindex the Magento 2 store with the following command:
php bin/magento indexer:reindex |
Then recompile it:
php bin/magento deploy:mode:set production |
Now, our website should have all our M1 products, along with their images:
 Magento 2 With Migrated Products
M1 to M2 Migration: Theme
You’ll save a lot of time by going with a premade Magento 2 theme.
You can port your existing M1 theme, but if you do that, prepare to dive deep into M2 internals.
In most cases, you are better off hiring a skilled Magento 2 developer.
A few things to keep in mind:
The XML structure of M2 is different than that of M1, so you cannot simply copy and paste the layout files.
M2 replaces the prototype JS framework of M1 with jQuery.
CMS syntax is similar, so you can make CMS pages work with a little effort.
I recommend basing your newly created M2 theme off the default Luma theme. This will give you a strong framework to work with.
M2 features three running modes: default, developer, production. Use developer mode to develop, and then production mode once the site goes live.
Magento 2 Extension Migration
M1 plugins won’t work with M2.
There is no reliable (at least to my knowledge) M1 to M2 migration coding tool that magically turns a M1 module into a M2-compatible extension.
You’ll have to do most of the work manually.
My advice would be to make a list of extensions you’d like to have on your new M2 site.
Then either hire a Magento 2 developer (one who offers Magento migration services) to refactor your extensions or find alternatives for them yourself.
When Things Go Wrong
The Magento 2 migration process isn’t always smooth, and many things may not go as planned.
Below, you’ll find some of the most common issues you might come across while moving to M2.
1. Empty Category / Landing Page
After migration, you may find that some pages look like this:
 Empty Page After Magento 2 Migration
Typically, this happens due to incorrect CMS syntax.
For example, a page can load static blocks with the following code:
This works with Magento 1 but not Magento 2.
You will need to change type=”cms/block” to class=”MagentoCMSBlockBlock”:
Those of you who are familiar with a MySQL command line could just run:
UPDATE cms_block SET content=replace(content,'type="cms/block"','class="MagentoCmsBlockBlock"'); |
This will update all static blocks.
2. Missing Catalog Images
This issue might be hard to spot.
If your newly migrated M2 store has broken product images on all category pages, or just a few of them, there’s an easy solution.
Just regenerate the image cache with this simple command:
php bin/magento catalog:image:resize |
This will resize the product images and put them in the correct cache folders.
The command may take some time to run, so be prepared to wait.
3. “No Such Entity” Error
This error message may appear in various places, including when you’re reindexing your store, performing backend activities, or on some of the frontend pages.
From my experience, this error is usually related to corrupted store tables: store, store_group or store_website.
Login to the MySQL command line tool (or use phpMyAdmin) and inspect those tables.
Do all group_ids found in the store also exist in store_group?
Is this true for the website_id field and store_website table?
Here are a few helpful SQL queries:
SELECT * FROM store JOIN store_group USING (group_id) WHERE default_store_id IS NULL;SELECT * FROM store JOIN store_website USING (website_id) WHERE default_group_id IS NULL; |
If any of the above queries return non-empty results, you have a corrupt table.
Dive deeper and delete hanging records.
4. Double .html.html in Product Urls
Some users report having .html.html in almost all product urls after they move to Magento 2.
That happens because they have .html suffix in either url_key or url_path product attributes.
Here is how to get rid of it.
Warning: Your wrong .html.html urls might have already been indexed by google. To avoid loosing any traffic make sure you put .html.html -> .html redirect in place after you apply my fix.
Login to DB and issue the following commands:
UPDATE catalog_product_entity_varchar SET value=replace(value,'.html','') WHERE attribute_id IN(SELECT attribute_id FROM eav_attribute WHERE attribute_code in ('url_key','url_path') AND entity_type_id = (SELECT entity_type_id FROM eav_entity_type WHERE entity_type_code='catalog_product')) |
DELETE FROM url_rewrite WHERE target_path LIKE "%.html.html%"; |
UPDATE IGNORE url_rewrite SET request_path = REPLACE(request_path, '.html.html', '.html'); |
Then reindex the database:
php bin/magento indexer:reindex |
And .html.html should now be replaced with a single .html.
Delta Magento 2 Migration
After the initial data migration, and theme, customizations and extensions migrations, you are ready to go live.
The final step is to transfer any new orders, customers (and sometimes products) created in your production Magento 1 store since you first migrated data to Magento 2.
Obviously, starting from scratch isn’t an option since you’d lose all of your customizations.
That’s when delta migration feature comes handy.
Data migration tool allows you to migrate only specific changes.
You can run these incremental updates as often as you want.
The command is simple:
php bin/magento migrate:delta /path/to/config.xml |
In our sample 1.9.3.9 -> 2.3.0 case, that would be:
php bin/magento migrate:delta vendor/magento/data-migration-tool/etc/opensource-to-opensource/1.9.3.9/config.xml |
Things to keep in mind about delta migration
There are a few things to remember while loading incremental updates:
Delta configuration doesn’t track every change that the Magento 1 database might have.
After an initial migration, do not remove or add products, orders, customers from and to your new Magento 2 database. This may break the delta migration process.
Do not change inventory levels in either of the databases (M1 and M2), or it may not be picked up by the delta script.
Test, Test, Test
I can’t emphasize it enough - thoroughly test your newly created Magento 2 before going live!
Make a list of ALL the features of your current Magento 1 and check them one by one.
Make sure all the payment methods work and the money is captured.
Test any complex shipping setups to make sure they work like they’re supposed to.
This may seem like common sense, but you would be surprised at the amount of mistakes you’d spot through regular check-ups.
At the end of the day, you want your shop to be stable, user-friendly and profitable.
You can’t expect any profits from a website that barely works.
A Few Final Words
Magento 1 to Magento 2 migration is no easy task, but with enough planning and attention to detail, you can pull it off with little-to-no downtime.
One important piece of advice I’d like to share:
Test drive your migrated Magento 2 store.
Test every bit of it: checkout, customer registration, product management.
Let me say a few words about load testing. This is when you put your new website under a simulated amount of average traffic.
How many people visit your Magento 1.x store a minute?
10, 50, 100?
Go ahead and see what happens to your Magento 2 site when 100 visitors hit it.
Does it become unbearably slow?
Do all the functions still work?
Can you checkout?
You want to make sure the site works well under every day traffic.
Once you’ve made sure all of that is in order, the next thing would be to pull the plug, make a DNS switch, and see your M2 site go live.
Did you move to M2 on your own, or did you seek out professional services? As always, you are very welcome to share your experience in the comment section.
All the best!
Find this article useful? Share it on LinkedIn with your professional network, spread the knowledge!
If you find this post interesting do not hesitate to sign up for our newsletter and join the 1010 people who receive Magento news, tips and tricks regularly.
Thank You!
This article provides a detailed and practical guide to Magento 2 migration, making it a must-read for developers and business owners alike. The step-by-step approach simplifies a complex process, ensuring clarity even for beginners. Highlighting the benefits of Magento 2, such as improved performance and scalability, adds value for decision-makers. I appreciate the emphasis on pre-migration preparation, which is often overlooked but critical for a smooth transition. Including real-world examples or case studies could further enhance the article's impact. Overall, a well-structured and informative resource for anyone planning a Magento 2 migration. Thank you for sharing!
Incredible insights on Magento 2 migration! This guide provided a comprehensive roadmap, making the transition seamless and maximizing our e-commerce potential.
Great guide, thanks! I have done all steps and all is working ok except adding or editing categories in CMS admin...
Where can be the issue? I did some debug but nothing found.
Thanks
greatt
Hi can you confirm does the migration tool needs to be carried out on a live production! as I understand the Data migration tool adds triggers for the delta changes to import.
thanks
Your article is very good! I have migrated 2 websites by following it. Thank you so much !!
Thanx for sharing this information its very helpful for us
Great Article very informative related everything needs to know. I'm impressed with data migration steps which are not an easy task thousands of queries over this topic are there.
This is really nice post works well and easy to configure...thanks for all info.
Great stuff, absolutely love it! Thanks for sharing!
Thanks for sharing this information.
I looove your article! Thanks for that!
And I think that migrating to Magento 2 is both exciting and kind of scary. While it really doesn’t matter which e-commerce platform you choose, but rather the business strategy you implement, Magento 2 does offer a lot of the features a business needs to grow.
Thanks a lot , it really helps me with Magento 2 migration and saves a lot of time.
Hi,
This blog incredibly covers all the points to magento migration. Thank you for sharing this detailed information on magento migration.
Thank you for sharing this information! It's great!
Thanks for good article! I really enjoing it!
Great guide!
But I've not found a satisfying answer to this Question: is it correct to migrate into a fresh M2 install, install extensions and make everything ready and finally do a delta migration before going live?
Or is a initial migration into a "launch ready" M2 (all extension installed) also possible?
Worth reading Article, With a list of amazing features, innovative technologies, and a growing developer ecosystem so Magento 2 opens up new avenues for eCommerce stores.
Love your resources! I appreciate your details and depth writing style and all your eye cache points was so awesome.
[...] then you’ve most likely heard it a thousand times: Support for Magento 1 is ending soon and a Magento 2 Migration is all but [...]
Great Guide!! I have done successfully Magento 1 to Magento 2 migration.
Thank you for this.. I did my migration myself and saved money :)
@Seam No, there is no dry-run feature.
Is there a DRY RUN feature?
@Mr Wheyter I'm not sure you can use migration tool to move data between two M2 installs.
Hello,
Thank you greatly for this post awesome, what happens when moving from magento2 migrated to a new clean install? I am about to use the tool you have described but I was just wondering, what if you use this tool to move magento 2.2.2 with to much data to a new clean 2.2.7 or 2.2.8 ?
[...] only way to avoid this is to perform a Magento 2 migration for your site. It is a time consuming process, but it is entirely possible to carry out the [...]
@felipe - Yes you can follow this guide to upgrade 1.7.0.2 to 2.3.0.
to migrate from magento 1.7.0.2 to 2.3 and the same process right?
[...] performing a Magento migration, please keep in mind that there are three things that need to be migrated [...]
Thank you for reminding us, we will also inform some of our consumers who are still using Magento 1 for upgrades this year. so that everything goes well. cheers